How to Install a Pellet Stove: Everything You Need to Know
Posted by Anna William on Jun 18th 2025
Are you considering installing a pellet stove in your home? You’re in the right place. Embers Living experts possess comprehensive knowledge about pellet stoves, and we offer full support throughout your installation journey. Whether you’re a weekend DIYer or just want to understand what goes into a professional installation, this comprehensive guide covers all the essentials. This guide takes you from analyzing your heating requirements through the detailed aspects of venting and safety while keeping installation costs in mind. Let’s get started! With appropriate guidance, you will soon find pellet stove installation to be both fulfilling and much less complicated than expected.
Before Installation: Learn Your Heating Needs
You should assess your heating requirements before choosing a pellet stove.
Pellet stoves come in a range of sizes and heating capacities. The right unit for you depends on the following:
- The size of the space you want to heat (measured in square feet)
- Your home’s insulation and layout
- Whether you want to heat a single room, an open-concept area, or supplement your whole home
Pellet stoves typically display their heating capacity measurement in BTUs. A pellet stove with 20,000 BTU capacity generally suits small homes and large rooms, while larger spaces require stoves with 50,000 BTU output.
When choosing a pellet stove, you need to consider ceiling height and window placement because they influence heating efficiency. By evaluating your heating needs at this time, you can save money and maintain optimal comfort during the heating season.
Tip: A heating professional or Ember’s Living can provide you with customized recommendations for optimal results. Our team will guide you through your choices to find a pellet stove designed for your home layout and lifestyle.
Steps for Installing a Freestanding Pellet Stove
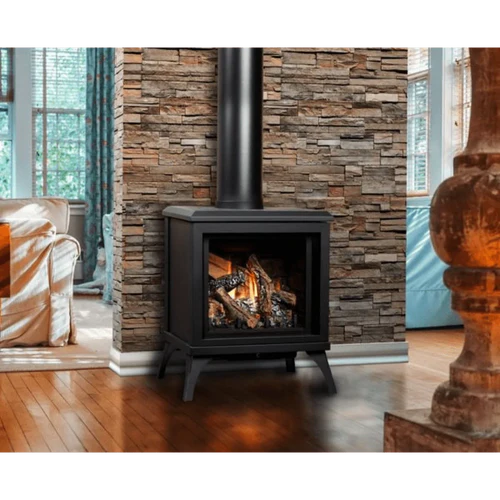
Individuals opt for freestanding pellet stoves due to their flexible installation options and convenience. The following guide breaks down the process into easy-to-follow steps that will help you understand how it works.
These stoves can be positioned in diverse areas throughout the home, which makes them perfect for residences that lack a fireplace. Efficient, clean heat will be yours quickly through proper planning.
1. Position your pellet stove and install a hearth pad
A hearth pad functions as a fire-safe barrier that safeguards your flooring against heat exposure and escaping embers. The hearth pad needs to cover the stove base completely and extend 6 inches beyond the stove front.
This pad serves the dual purpose of protecting your space from heat while enhancing your installation to match your home’s style. Select a hearth pad that conforms to both local building regulations and stove manufacturer requirements.
Install the stove on the pad while preserving the minimum clearances specified by the manufacturer between the stove and walls or combustible materials, which should be at least 3 inches.
Correct positioning of the stove ensures safety and effective heat distribution and requires precise measurement and verification of all distances. The installation process starts with establishing a secure and durable foundation for your pellet stove.
2. Cut a Hole for the Vent
Ventilation systems must be used in pellet stoves to release combustion gases into the air safely. The standard installation approach employs a 3-inch flue pipe which extends through an outside wall. Identify the location while steering clear of wall studs and then make the hole using either a reciprocating saw or a hole saw.
Always inspect walls for electrical wiring and plumbing before cutting because safety takes priority.
The proper positioning of a vent guarantees smooth operation while preventing smoke or fumes from entering your home.
Pro tip: It is essential to position vents at least 12 inches away from windows, doors, or air intakes to stop exhaust from entering your home. The positioning of this Vent supports indoor air quality maintenance while meeting common local building standards. Proper planning at the start of installation helps avoid expensive modifications later.
3. Insert Vent Thimble and Piping
The wall thimble serves as a protective sleeve that stops the hot exhaust pipe from coming into contact with any flammable wall materials. Place the thimble inside the hole before threading the vent pipe through its opening. Fasten all pipe joints securely using screws and apply high-temperature silicone caulk to create an airtight and safe connection.
Verify all piping sections have proper alignment and support to avoid sagging and leaks.
To operate safely and efficiently, your pellet stove requires a secure vent system.
A secure installation maintains your home’s structural safety while minimizing fire risks.
When you invest additional attention during installation, you secure peace of mind while enhancing your stove’s peak performance throughout its lifespan.
4. Attach the piping and an electrical outlet to your pellet stove.
Connect the exhaust pipe to the stove’s rear side while adhering to the provided manufacturer’s guidelines. Most pellet stoves need a connection to electrical power for their auger and fans, so it’s essential to plug them into a grounded outlet. Ensure that all connections are secure and the stove stands level before you ignite it for the first time.
The stove needs to be level for proper pellet feeding, which leads to uniform burning and maximizes efficiency.
After confirming all connections, you can load your first bag of pellets to start enjoying the heat.
Five Steps to Installing a Pellet Stove
Find out how to install a pellet stove insert in your existing fireplace with this step-by-step guide.
Installing pellet stove inserts into your fireplace achieves both modernization and enhanced heating performance. These inserts fit perfectly into your current fireplace to transform a standard wood-burning hearth into a clean and efficient heating solution.
1. Prepare Your Fireplace
Before installing your fireplace, you must clean it and perform a detailed inspection.
Clear all waste material and blockages from both the firebox and chimney. Ensure that the structure of your fireplace meets local building codes and remains structurally intact.
A complete check will identify problems such as cracked masonry or creosote buildup that need resolution before moving forward.
The preparation process is vital to ensure both your safety and the optimal long-term operation of your pellet stove insert.
2. Insert the Chimney Liner
You need a stainless steel chimney liner to safely direct combustion gases from the insert through your existing chimney. Guide the chimney liner downwards from the top until it reaches the firebox opening.
The liner creates an insulated path for exhaust, which maintains smooth flow without leaks and enhances the draft.
Protecting your chimney against pellet stove exhaust corrosion helps maintain your system’s longevity.
3. Plug in your stove and attach the liner adapter.
Attach the liner adapter to the insert exhaust outlet. Connect the stove’s power cord to a nearby outlet by verifying proper grounding.
The stove’s automatic feed and fan systems require a secure electrical connection to work properly.
Maintain safety by placing cords out of reach from hot surfaces and verify that all electrical connections remain tight and secure.
4. Insert the pellet stove and attach the liner to the fireplace.
Gently move the insert into the fireplace opening. Ensure all joints between the liner adapter and chimney liner are tight and sealed before attaching them together.
Use a flashlight to inspect all connections, confirming there are no gaps or loose fittings.
An effective seal and proper fit between components allow for efficient venting, which keeps smoke and gases from entering your living space.
5. Cap the Liner at the Chimney’s Top
Use a chimney cap to prevent rainwater, debris accumulation, and animal intrusion in the chimney. Maintaining a proper draft for your pellet stove requires this essential safety measure.
Your stove and liner remain protected from downdrafts and moisture damage when you install a quality chimney cap.
Use a cap made specifically for pellet stove liners to achieve proper compatibility and durable performance.
Pellet Stove Installation in Five Steps
Here’s a quick summary for both freestanding and insert models:
- Select the proper placement for your hearth or fireplace area and begin preparations.
- Mount the venting system, which may include a wall or chimney liner.
- Connect both the venting system and power supply to the stove.
- Connect all joints securely and verify clearances.
- Activate the stove to experience efficient and clean heating.
The design of each step ensures peak safety and performance while reducing installation difficulties.
The proper use of this checklist can prevent typical installation errors and optimize your new pellet stove’s performance.
Pellet Stove Installation Kit: What’s Included?
A pellet stove installation kit typically contains the following:
- Vent pipe (usually 3-inch or 4-inch diameter)
- Wall thimble or chimney adapter
- Elbows and connectors
- Pipe straps and mounting hardware
- High-temperature silicone sealant
- Exterior vent cap
Installation becomes more straightforward with these kits, which come packed with every required component for a secure and code-compliant installation.
A full kit will eliminate the need for extra trips to the hardware store while making installation smoother.
Ensure your kit aligns with your stove specifications and local building regulations to avoid any installation issues.
Pellet Stove Installation Requirements
There are specific installation requirements for pellet stoves.
- Clearances: Maintain the manufacturer’s recommended distance from walls, furniture, and combustibles.
- Venting: Use approved venting materials and follow local building codes.
- Electrical: Ensure a grounded outlet is available for the stove’s power needs.
- Permits: Contact your local authorities for permits or inspections before installation.
It is vital to meet these requirements to maintain safety standards as well as insurance requirements.
Correct installation safeguards your home while enabling the pellet stove to perform optimally.
A wise choice exists in consulting a professional installer or contacting Embers Living whenever you feel uncertain.
Final Takeaway
A pellet stove installation brings together home heating efficiency and convenience while creating a warm and inviting atmosphere. By choosing between a freestanding model or an insert and adhering to proper installation procedures you can guarantee your pellet stove functions safely and reliably for many years.
After proper installation, a pellet stove will enhance your living environment by providing heat and a rustic style.
Embers Living provides top-rated pellet stoves along with expert advice for those who need guidance in selecting the best stove or who wish to explore our range.
FAQs
Can I install a pellet stove myself?
Skilled DIYers can perform pellet stove installation, yet they must adhere to both manufacturer guidelines and local building regulations. For complete comfort, choose to hire a professional when in doubt. DIY installation provides a sense of accomplishment, but safety must remain your primary concern. Expert installers assist you with permit requirements and optimize your stove installation for peak performance.
What’s included in a pellet stove installation kit?
The standard pellet stove installation kit contains vent pipes together with wall thimbles or chimney adapters and additional parts such as elbows and connectors as well as pipe straps and sealant. The installation kit components should fulfill safety requirements and adhere to building codes. Ensure your installation kit corresponds with your stove model and local building codes before you begin your project.
Do I need a special outlet for my pellet stove?
Pellet stoves need a grounded electrical outlet that supplies power to both the hopper and the fans. Typically, an exclusive circuit is recommended to safeguard your home electrical system from overload. Refer to the stove’s manual for electrical specifications and seek an electrician’s assistance as necessary.
Where should I place my pellet stove?
Central locations are perfect for promoting heat circulation! It’s important to set your stove on a noncombustible hearth pad and ensure there are proper clearances around it. To keep everyone safe and optimize efficiency, try to avoid placing the stove near windows, doors, or busy areas. Don’t forget to consult your stove’s manual and local codes for any specific placement guidelines — it’s worth it!
Can I install a pellet stove in an existing fireplace?
Absolutely, pellet stove inserts are perfect for this! They provide an amazing way to enhance your old fireplace while still keeping that charming, classic hearth you love. With this option, you can relish the efficiency and convenience of pellets without compromising on style. For the best results, it’s a wonderful idea to have a professional install it, ensuring it fits just right and vents safely.
Ready to warm up your home? Visit Embers Living for the best selection of pellet stoves, fireplace inserts, and all the accessories you need for a safe, stylish installation. Our knowledgeable team is always available to answer your questions and help you find the perfect heating solution for your space. Don’t hesitate; start enjoying the efficiency and comfort of an Embers Living pellet stove right now!

