


How to Start a Gas Grill
Posted by Anna William on Sep 9th 2025
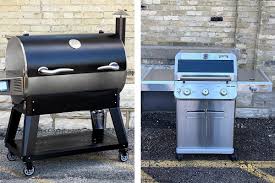
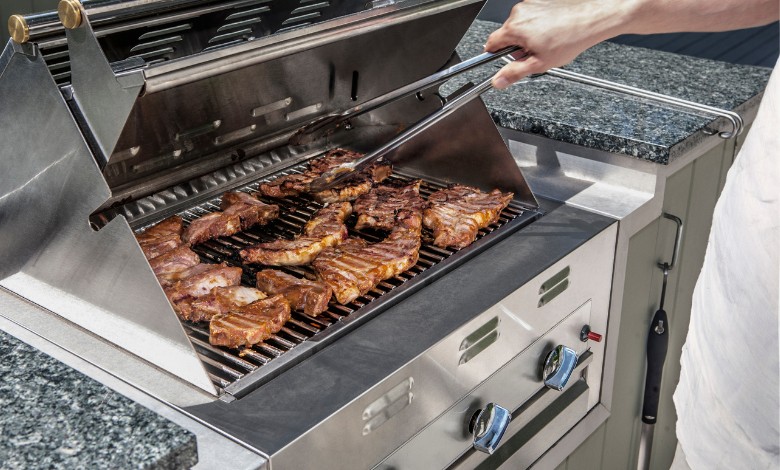
There’s nothing quite like the sizzle of food on a gas grill, the smoky aroma filling the air, and the anticipation of a delicious meal. Whether you’re grilling steaks for a family dinner, burgers for a backyard party, or veggies for a healthy outdoor feast, knowing how to start a gas grill is a crucial first step. With just a few simple steps, you can master the art of grilling, ensuring your barbecue sessions are smooth and hassle-free every time.
In this guide, we’ll walk you through the process of starting your gas grill, explain some key maintenance tips, and share expert grilling advice to make your outdoor cooking experience the best it can be.
Step 1: Gather Everything You Need
Before you even think about turning on your gas grill, it’s important to make sure you have everything you need within arm’s reach. Getting all your tools and ingredients prepared in advance can help you avoid wasted time and stress. Here's a list of what you'll need:
- Gas Grill (of course!)
- Propane Tank (or natural gas supply if that’s how your grill is set up)
- Grilling Tools: Tongs, spatula, grill brush, meat thermometer, and brush for oiling the grates
- Seasonings and food to cook
- Lighter or Match (if your grill doesn’t have an electric ignition)
Step 2: Check the Propane Tank
This step is often overlooked, but it’s crucial to ensure you have enough gas to grill. Ensure the propane tank is tightly secured to the grill and check that it has enough fuel for your cooking needs. If you’re unsure, give the tank a quick inspection, and if it looks low, head to your local hardware store or gas station to refill it. Some grills come with an indicator gauge to tell you how much gas is left, but if you don’t have one, it’s better to be safe than sorry.
Also, check the hose and valve for any signs of leaks. A simple way to do this is to use a soapy water mixture—apply it to the hose and valve, then turn on the gas. Bubbles appearing indicate a leak. If this happens, make sure to fix or replace the hose before lighting the grill.
Step 3: Open the Grill Lid
Before you begin igniting your gas grill, always open the lid. Starting a gas grill with the lid closed is a major safety hazard. If gas accumulates inside, it can cause a dangerous flare-up or explosion when you light the grill. Keeping the lid open ensures that the gas has a chance to dissipate safely.
Step 4: Turn on the Gas Supply
Next, locate the gas control valve on your propane tank. Turn it counterclockwise to open the valve, allowing gas to flow into your grill. Be careful not to overdo it—opening the valve just enough to allow gas flow is sufficient. Now, let’s move on to the next step.
Step 5: Ignite the Grill
Once the gas is flowing, you’re ready to ignite the burners. The process for igniting a gas grill depends on the type of ignition system your grill uses. Here are the two main types:
- Electronic Ignition (Push Button):
- Turn the burner knobs to the "start" position (low).
- Press the ignition button. This will produce a spark that lights the gas.
- If the grill doesn’t ignite right away, wait a few seconds and try again. Sometimes it takes a few attempts.
- Manual Ignition (Using a Match or Lighter):
- If your grill uses manual ignition, you’ll need to use a long lighter or a match.
- Turn the burner knobs to the low position first.
- Light the match or lighter and hold it near the burner while you turn the gas knob to the "on" position.
- Be sure to light the burner immediately as you turn on the gas to avoid any gas buildup.
In both cases, if the grill doesn’t light after several attempts, immediately turn off the gas and wait at least 5 minutes to allow any excess gas to dissipate before trying again.
Step 6: Adjust the Heat
Once the burner is lit, adjust the flame to your desired heat. Most gas grills come with multiple burners, so you can control different heat zones. For example:
- Low Heat: Ideal for delicate foods like fish and vegetables or slow cooking.
- Medium Heat: Perfect for burgers, chicken, and vegetables.
- High Heat: Used for searing steaks, ribs, or other cuts of meat.
If you’re cooking multiple foods, you can use a combination of high and low heat zones to make sure everything cooks evenly.
Step 7: Preheat the Grill
Once your grill is fired up, allow it to preheat for 10 to 15 minutes before adding any food. This step helps burn off any remnants from your last cookout and ensures your food cooks uniformly. You can also use this time to give the grate a quick scrub with a wire brush to clear away any remaining bits of food.
Step 8: Clean the Grates
It’s a good idea to give your grill grates a quick clean before and after each use. To clean the grates, take a wire brush and gently scrub while the grill is still warm, but not excessively hot, to prevent any risk of burns. This will ensure that the grates are ready to cook your food without any residual buildup that could affect the flavor.
If you want to take it a step further, consider oiling the grates with a paper towel dipped in vegetable oil. This prevents food from sticking and adds a nice layer of flavor.
Step 9: Place Your Food on the Grill
With your grill heated and all set, it's time to get cooking! Arrange your food on the grates, ensuring there's ample space between each item for consistent cooking. If you’re cooking meats like steaks or burgers, use tongs to flip them, avoiding poking holes that would release the juices.
Be sure not to overload the grill. Putting too much food on it at once can reduce the heat, leading to uneven cooking. Allow enough space for air circulation, which ensures everything cooks at the right temperature.
Step 10: Monitor the Cooking Process
Once your food is on the grill, keep a close eye on it. Gas grills are quick to heat up, so you may need to adjust the temperature or flip the food more frequently than you would with a charcoal grill. Use a meat thermometer to check for doneness, especially when grilling thicker cuts of meat.
Be patient, and if you want those perfect grill marks, resist the urge to flip the food too often. A good rule of thumb is to flip your food once—unless you’re cooking delicate fish or vegetables.
Step 11: Turn Off the Gas When Done
Once you’ve cooked your food to perfection, don’t forget to turn off the gas! First, turn the burner knobs to the off position. Then, turn the propane tank valve clockwise to close the gas supply. This will prevent any gas from leaking out.
It’s also a good practice to let your grill cool down before covering it with a grill cover. This will extend the life of your grill and keep it in top condition.
Step 12: Clean the Grill After Use
Once your meal is complete, thoroughly clean your grill. Proper cleaning after every use is key to ensuring your grill stays in top working condition. Here’s a simple checklist to help you stay on track:
- Clean the grates with a wire brush.
- Empty the grease tray.
- Check for any food particles or residue around the burners.
- Clean the exterior with a damp cloth.
Proper maintenance ensures that your grill is always ready for your next cookout.
Common Troubleshooting: How to Handle Issues When Starting Your Grill
Even with all the preparation, problems can sometimes arise when trying to start your gas grill. Don't worry, common issues can usually be solved with a bit of know-how. Here are some of the most frequent problems and how to troubleshoot them:
Problem 1: The Grill Won’t Ignite
- Check the Gas Supply: Ensure the propane tank is full, or the natural gas line is connected properly. If your tank is empty, replace it with a full one. If you're using natural gas, ensure the gas supply is on.
- Inspect the Igniter: If your grill uses an automatic ignition system, check the igniter. If it’s not sparking, you might need to replace the battery or clean the spark module.
- Manual Ignition: If the igniter is still not working, try lighting the grill manually with a match or lighter (but make sure the lid is open).
Problem 2: The Flame is Too Low or Uneven
- Check for Blocked Burners: If you notice low or uneven flames, food debris or grease buildup could be blocking the burners. Turn off the gas and clean the burners before trying to ignite again.
- Ensure Proper Gas Flow: If the gas flow is low, the burner flame will be weak. Ensure that your gas tank is not running low, and check the gas valve for any issues.
- Adjust Burner Knobs: Sometimes, the flame will appear low if the burner knobs are not fully turned on. Ensure that all knobs are adjusted correctly for the desired heat.
Problem 3: The Grill Won’t Stay Lit
- Check the Gas Tank Valve: If the gas tank valve is partially open, the grill may not stay lit because the gas flow is insufficient. Make sure the valve is fully open.
- Burner Issues: If one of the burners keeps going out, check for a blockage in the burner tubes. Clean the tubes thoroughly to ensure they’re free from debris.
Problem 4: The Flame is Yellow or Orange
- Clean the Burners: A yellow or orange flame could mean that the burners are dirty or that there’s not enough air mixing with the gas. Clean your burners thoroughly and check for any obstructions that could hinder airflow.
- Check for Gas Leaks: If the burners are clean and you still have an unusual flame color, there could be a gas leak. Mix some water and dish soap, and apply it to the gas lines and connections. If you see any bubbles, you have a leak, and the connection should be fixed immediately.
Problem 5: The Grill is Smoking Excessively
- Excess Grease Build-Up: Excessive grease buildup can cause smoking. Make sure your grease tray is clean before starting the grill. If there’s a lot of grease, it may even catch fire, causing excessive smoke.
- Burner Obstructions: If food or debris is obstructing the burners, it may cause an uneven flame or smoking. Clean your grill regularly to avoid this.
Conclusion
Now that you know how to start a gas grill, you’re ready to get cooking! Whether you're preparing a family meal or hosting a backyard BBQ, following these simple steps will ensure that your grill is ready to deliver perfectly cooked food every time. And remember, safety should always come first—so take the time to check your grill and gas supply before each use.
At Embers Living, we believe grilling should be a fun and effortless experience. Whether you're a first-time grill master or a seasoned pro, we’ve got everything you need to elevate your grilling game. So, grab your apron, fire up that grill, and let the good times roll!